VLC has been the most used multimedia player for years. This small program allows us to play videos in practically all existing formats and includes some of the most interesting extra functions. Today we will explain how to send content to your Chromecast using VLC.
THIS IS HOW EASY IT IS TO SEND CONTENT FROM VLC TO CHROMECAST
This feature is only supported by VLC version 3.0 or higher. If you have an older player version, you can install it free from the official website. VLC 3.0 is available for Windows, Mac, Linux, Android, and iOS, so all users can benefit from it.
The first step we need to do is to connect our VLC player to our home Chromecast device. First, ensure your Chromecast is well-configured and connected to your WiFi network.
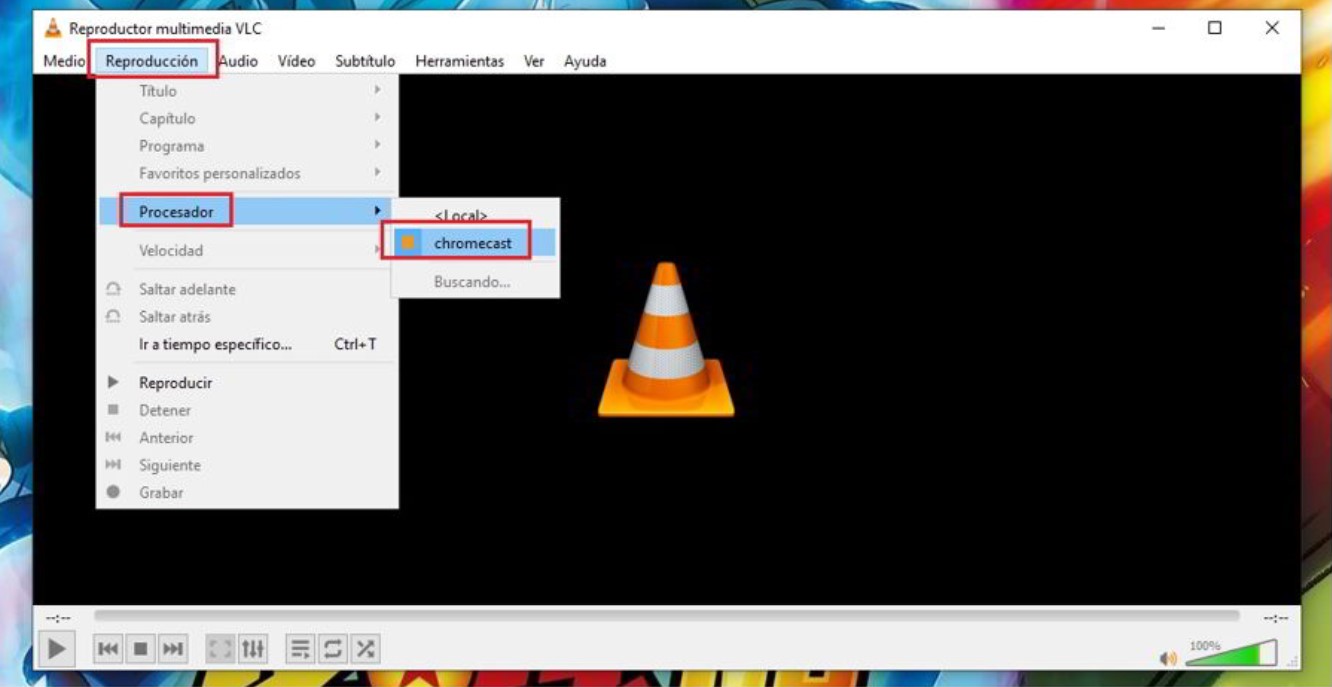
Once you have checked the above, open VLC, click the “Playback” tab, and enter “Renderer.” Here you will see a list of all VLC-compatible devices. Your Chromecast should appear without any problems. Just select it, and you will have already linked it with VLC.

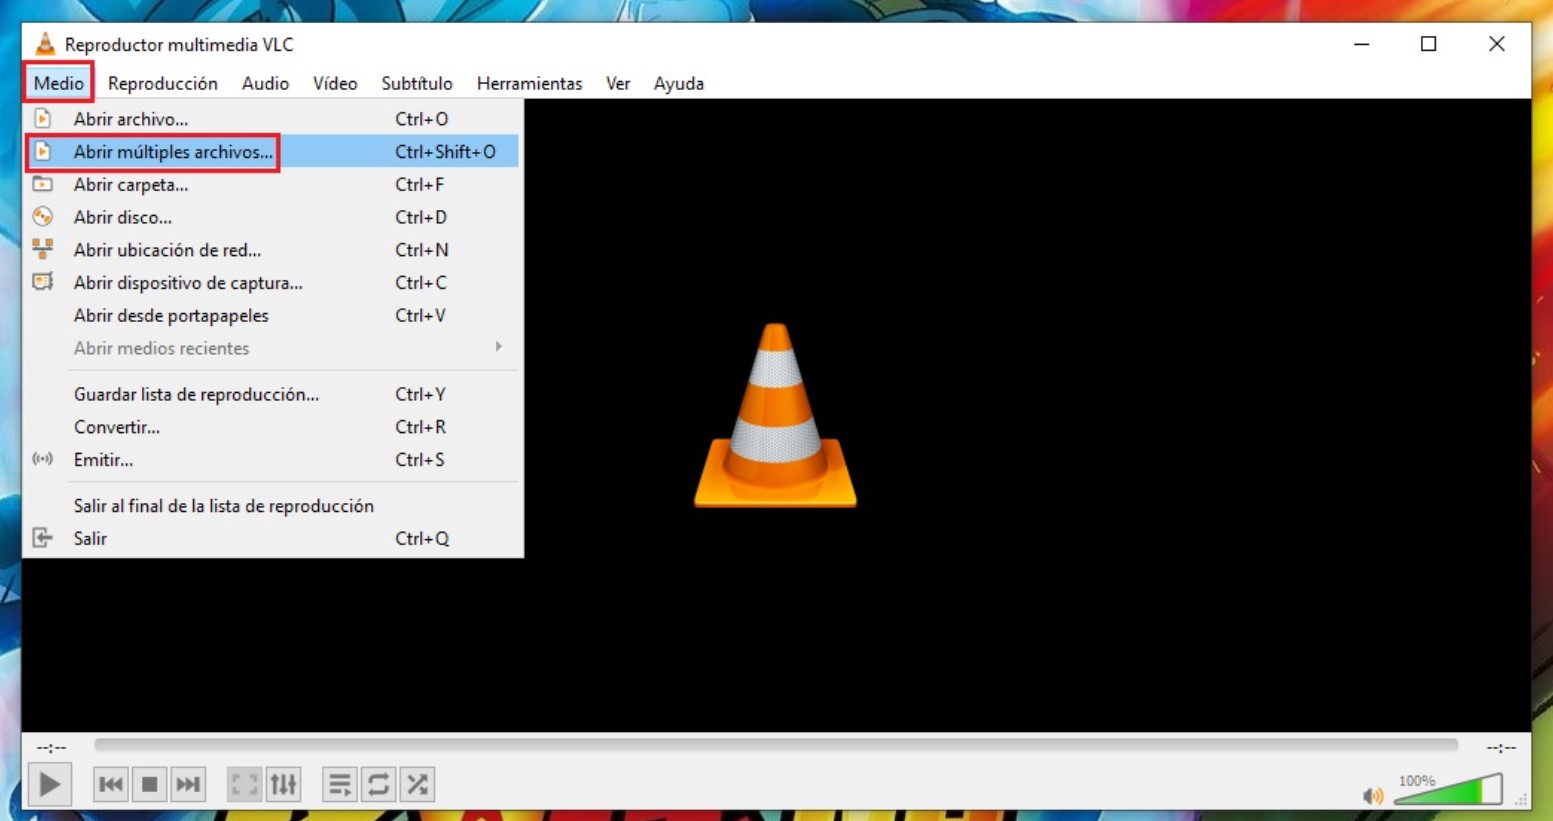
Now you can start sending multimedia content to your TV with Chromecast. You must create a playlist with all the files you want to send. You just need to go to the “Media” tab and add all the files you want. As you can see in the image, you can add a file or more, a folder, a drive, and some more options.

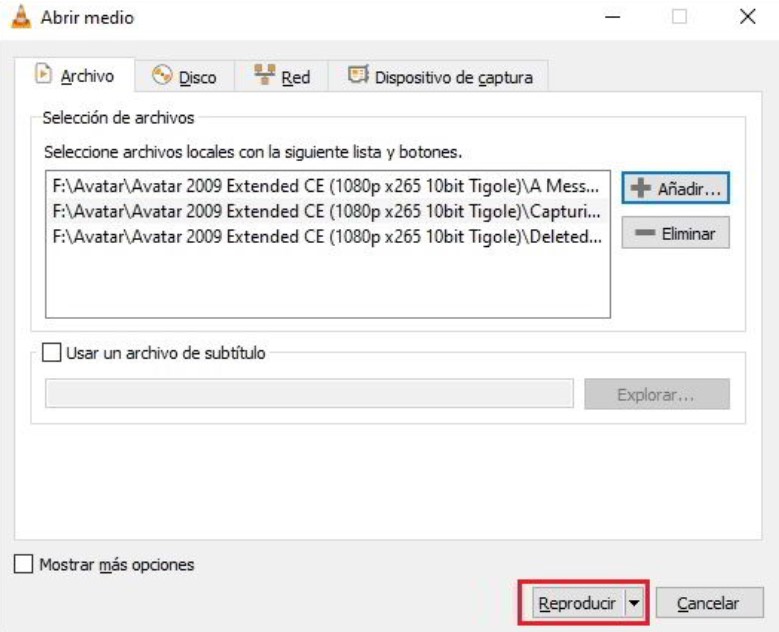
A window will open from which you can add your files. Once you have all of them ready, you just have to click on the “Play” button at the bottom of the window to start streaming the content.

Immediately you will see that the content begins to play on the television.
This is all you need to do to send VLC content to Chromecast. We hope it will be very useful for you. Remember that if you liked the post, you could share it with your friends on social networks. In this way, you can help more users who need it.

I am a writer with eight years of experience writing in business and technology. I always carry a passion for learning and discovering new knowledge.

